Aloha and Welcome to my small speck of cyberspace! Dec 8, 2010 is the birth date of my blog. Never had one before, but my son encouraged me to have one, and it seemed like a good way to at least keep a log of my RC airplane building and flying. With the initial design kicked off by my son, I'll carry on from here and have fun with it. Now that I have it, I will use it to also keep track of my oil painting efforts, and any other ideas, hobbies, travels, or whatever else that come up. LIFE IS GOOD!

Update on 02/25/2011. It's been a few months since I began this blog, and I am enjoying creating and having it! I like documenting the things I have done in my hobbies, and sharing with my small family. I think Jer and Tad actually view it fairly regularly, as a means to see what I've been up to lately. At worst, it serves as a reference for my own use.

Update on 12/22/2011. This blog stuff is habit forming. My blog is a year old now, and I make an entry about every other day or so as that seems to be the frequency of doing something in one of my hobbies. Like my hobbies, this blog is a lot of fun, and it has become in itself another hobby that I enjoy.

Years are flying by...update on 01/11/2013. Still enjoying maintaining this blog even though hardly anyone sees it. I don't advertise it anywhere or to anyone, and it is mainly just a way for me to keep my own notes and thoughts on my flying, painting, and cars. If a stranger happens upon it, I think it is by pressing NEXT at the top of the current blog they are visiting, lol. It's a great device for me.

August 2014: still here! Took up flying RC helicopters one year ago and got hooked. Had flown micro Helis up to then, but got serious with 450 size for a couple months, then bought the Goblin 500 and Gaui X5 . Also got my Boxster in April 2013. Most importantly, Ariel was born 12/02/12 followed by Skylar 07/20/13, and they are little beacons of joy in our lives. Life is indeed good!!!

Saturday, February 26, 2011

Switches are ON

I finally installed the 3 heavy duty switches in the Ultimate today.  The single one in front is for the ignition.  The pair are for the receiver and servos.

Had a mental block to do them because of the structure inside the fuselage that complicates placement of the switches, and access to them from behind.  I chose areas where there was a single layer of balsa to cut through, with no doublers, and which would not interrupt the exterior color trim on the fuselage.
That inner fuselage structure made it a little challenging to get my fingers and the backplates in, but it turned out really well!

Friday, February 25, 2011

ULTIMATE Decal

Am I going to blog about every single new vinyl decal that I make with the Cricut?  PROBABLY, haha.  Here is the large name decal for my AW Ultimate bipe.  This is about 15" long and 2" hign in Vivid Blue.  I chose the font off the free font disc I got with SCAL2.  After I used the font, the name of it somehow got lost in SCAL2, so I can't even find it again out of thousands on the disc!  Anyway, I probably won't need it again, but is sure is cool to me!  (Note to self...write the font name down next time.)

Here is a pic of the fuselage with 3 Cricut decals mocked in place:

THIS is exactly what I hoped to achieve with my venture into Cricut, to be able to create my own decals for any plane!

Thursday, February 24, 2011

Pennzoil Decal with Cricut

I had some fun making a pair of Pennzoil vinyl decals for my Aeroworks Ultimate with the Cricut.  I found this logo online:
Of course, I cannot reproduce that exactly since I am limited to sheets of vinyl that are pre-colored.  So I ran that logo through Inkscape, then SCAL2, and came up with this finished vinyl decal today:
ACTUALLY the only shape that survived the process is that red bell.  The outline is from the online logo.  I recreated the letters with a font in SCAL2, and likewise redid the oval.  Both were badly shaped after Inkscape.  As it is these letters are not sharp, but are good enough, because the Cricut just is not capable of making sharp angles.  It is good with straight lines and gentle curves, but not the sharp corners in the letters.  Still, I am happy with the result and they will go on my plane.  Stand 3' away, and they look good, so these are Standoff Scale decals.  :)  BTW, I purposely chose that dark yellow to match my plane.  I have a lighter yellow that matches the online logo better, but not the Monokote on my plane.  Similarly the blue letters match the blue on my plane, so I went with that rather than black.  That is one of the added benefits of making my own decals...I can alter their colors, as well as size, to match my planes.

Wednesday, February 23, 2011

Lakeside Hideaway


Here is painting #23!  I wanted to try something different...black clouds in a sky with blue on top and light brown on the bottom.  I wanted to work on mountains again too, getting the paint to "break", so Bob Ross says.  Got better at that today.  :)  Overall, I like how the painting came out.  Big trees up front really push the other things back and create depth that is desired. 


After looking at the painting more, I decided to add some white to top off the clouds.  Looks better.

TAXES!

Yeah, who doesn't hate paying taxes!?  I have had Turbo Tax for a couple months, and I finally loaded it on the PC because Jer wanted to do his returns.  I loaded it Sunday AM and Jer did his that night.  LUCKY!!  That made me think about it more seriously, and on Tues I started to load in my income and interest, etc, and soon I was hooked.  I spent most of the day getting the FED and OR returns done.  Fortunately TT does the work of figuring the way to minimize the tax and maximize my refund.  This is my first year with Alex in college, so TT figured that the All American Education Credit is the way to go.  TT also was improved this year so it now recognizes how OR treats federal retirement income like mine, which is a big benny for me.  I think it does it slightly wrong, but I corrected it to my satisfaction and believe I have it right.  After a couple days of sitting on it, I will submit the returns!  I feel relief and might paint today, to free my spirit completely!

Sunday, February 20, 2011

Flight Log: 02/20/2011

Brrrrr, cold 45F with 10 mph wind made it feel very cold out there, but Joe, Mike, Bob, and I flew...die hards!  My Giles 202 flew well in the wind, but I had to quarter in the landings from the east because of the strong cross wind from the south.  3 flights, 3 decent landings, nothing broken.  ON the 3rd start, I noticed the idle was high, and it seemed to be even higher on the landing, so I had to make 3 tries at landing.  When I got to the pits, I wiggled the muffler, and sure enough it was loosening, but I don't think loose enough to lose a bolt like Jer did recently.  The loose muffler also explains the difficulty to get the engine primed on the last flight.  I will retighten the bolts and use red thread locker this time instead of blue..."permanent" vs temporary.

Mike flew his Revolver while I was flying the Giles.  He landed before me, and didn't land on the first attempt.  Proceeded around and made 2nd attempt during which he flew it right into the runway, tearing the LG off, which then proceeded to tear the right stab off pretty completely, and dislodged the left side less.  He said it was pure pilot error.  While coming in, he was too high, so he backed off on up elevator, and it smacked the ground before he knew it.

Friday, February 18, 2011

High Haven

Here's my 22nd painting, and 2nd for 2011, in the Bob Ross method.  My paintings have been taking less time since I first started oil painting, but his one took  a long 6 hours today.  I tried to do things better, so it took more thought and time.  BUT I am pretty happy with the results!  I think my clouds improved on this one, the evergreens, the bare tree, and the layout.  I kinda like making these darn cabins and fences too, but I don't want them in every painting.  Also have enjoyed making snow lately, but I don't want that all the time either.

Dumb Dog Do Do

When I walk in the neighborhood (3x-4x per week), it never fails that I find dog crap on the sidewalks.  I blame it on the owners for not picking it up.  I think some of them keep the dog walking or running, because sometimes it's an obvious trail of poop from the same dog.  Maybe they need it to find their way home.  All I know is that I have my head down often to make sure I don't step in it, or trip on anything else. 

Thursday, February 17, 2011

Airworthy again!

This is going to be a whole lot of pics of my repaired Extra 330L.  If I had planned properly, I would have taken pics of the carnage before doing the repair work.  As it is you only get an idea of the damage by seeing the extent of the repairs.  I'm ready to fly this plane again.  One thing dumb incidents do is teach me to be more careful for awhile, till I do something else dumb again!  I had a similar incident before with the CG Ultimate - caught the main LG on the top inch or two of the east end of the runway.  That time my LG stayed on and the plane just turned over on its top.  I can't recall any damage other than bending the wire LG, so I bent it back and it was fine.  Since the damage was much greater on the Extra, maybe I will learn the lesson better and longer, lol.

Two longerons on the left side were removed by the LG,
so I spliced in new pieces with doublers.
Doublers were set just below the finished surface so
that they would not show after being covered by Monokote.

Two thin layers of landing plates were ripped out
in the incident, they should be in the center of the pic!

I used the Dremel to grind away the male keys on
the side plates for interlocking to the main LG plates.
Here's a new LG plate of 1/4" hard ply, with male keys
for the firewall.  New blind nuts and bolts installed .
Plate in place with lots of 30 minute epoxy.
New formers on top of plate, behind firewall.
Added triangular stock behind firewall.
Added extra ply plate on side of new LG plate to
brace it to side plates better.
Added triangular stock on left side.  One was already on
right side.  Go figure...the highly paid China worker forgot one.

Monokote is back on!

Ahhh, feeling better with LG secured.

Large FG bandaid to repair damage caused by
muffler pipe when the plane slid to a stop on its belly.
Many FG patches on pants!
All PAU, stronger than before but not as pretty.
READY TO FLY!

Wednesday, February 16, 2011

VXL downer

Went racing at RC+ with Jer and Anthony on Feb 12, 2011.  Long story short, my car stopped completely during the 3rd battery.  Jer quickly deduced it was a bad steering servo just like his.  Bah humbug.  I wrote to Traxxas and they did not quickly replace mine like for Jer.  They said I need to send it in and it would cost $5 to ship it back to me and $15 for repair.  I would have to pay about $5 to ship it there, so that's $25 for a servo which costs that much at Tower.  I basically told them I would not be buying Traxxas anymore.  I then wrote e-mail to Tower Hobbies and forwarded them the e-mail exchanges with Traxxas; I told them this reflects on them too since I bought the car from them.  Tower right away said they would send me a free replacement.  I got notice today that it has been shipped from Reno, yay.  Too bad, the car is cool, but the durability of the very important steering servo is highly questionable based on how fast they died in Jer's car and now mine.  I don't know what I will do after the free replacement dies like I expect it to.  I do know I will not support Traxxas a single penny more.

KRCA Krosswinds

Tad came up with the nickname, and I have proposed it to the exec comm of our RC plane club.  I designed the sticker layout.  Looks cool mounted on my Extra 330L...the decal is 2.5"x5.5" in silver.  Jiminy Cricut!

Monday, February 14, 2011

Jiminy Cricut!

From this:

To this:
 
Then THIS:


AND THIS:


HOW COOL IS THAT?!  :)  Decal/sticker sets for large planes like this can cost $100 easily from various vendors...I'm talking about 8-10 decals for the whole plane.  Several months ago, I read on RCU where one guy was starting to make his own vinyl decals with a Cricut machine.  I did some estiimating and figured that if I got the equipment, I could break even if I did decal sets for just two of my future planes.  I jumped in and won a Cricut Expression on eBay for about $160.  I got Sure Cuts A Lot version 2 (SCAL2) also on eBay for about $75, which include the printer cable to connect the Cricut to my PC, and some extra cutting blades.  Then I picked up some 12"x24" vinyl sheets at $1.60 per sheet off eBay too.

After a month of hesitation and fear of the new undertaking, I decided today to set it up and give it a go.  I actually had found and downloaded the XOAR logo and got it into SCAL2 a couple weeks ago.  After initial testing on paper, I cut my very first vinyl stickers.  They are 3" across in red.  XOAR is the brand of props that I am using on this Extra 330L and my new Ultimate 20-300.  I will likely make silver or blue XOAR stickers, 4" across, for the Ultimate.  I  am pretty self satisfied with the success of the venture.  GRINS!!!

Friday, February 11, 2011

Hold that Tiger!


One good thing that came of yesterday's fiasco at the field is that my hold down for the plane worked real good.  I made a hold down using two rope loops that clip to a carabiner thingy from Lowes, which in turn is attached to a long spike.  The spike is nailed into solid dirt with a hammer, till almost flush with the ground.  Put one loop on each side of the stabilizer, and pull the plane forward to make the rope taut.  Once the plane is started and idled down, just pull the plane back and slide the loops off.  This is a good thing as it forces you to adjust idle so the plane doesn't roll forward while releasing the rope.  When done flying, just remove the spike with the claw hammer.  This was the first time I used it, and alone too, which is what it's for.  IT WORKED REALLY GREAT!

Thursday, February 10, 2011

Insult to Injury!

CRAPS, I should have stayed home today.  When I started the truck to go flying, it was weak, but I figured it would start again.  Right there was my first mistake!  I should not have gone.  As soon as I got to the field, I tried to restart the engine.  I figured it surely would work after charging on the 15 minute drive.  NOPE, nada, zero, zilch.  What to do.  I decided to fly since I was stuck, and I figured someone would come to fly in perfect weather like today with calm air, sunshine (no clouds at all), 50F, wowsers!  10:30 when I arrived.

I had a good first flight with the 50cc Extra 330L.  Landed a little fast, but it stopped on the runway, so all was good.  The engine restarted well and up I went again.  I got the idle slowed a bit and was making a perfect landing.  I thought it was a done deal.  I must have been one inch too low because my LG got cleanly wiped off the bottom of the fuselage.   I couldn't believe my eyes as the Extra rolled over the LG and belly slid to a stop.  Broken prop, broken muffler pipe still dangling to the muffler can, typical hole in the bottom of the wing due to the sharp end (of course) of the wheel pants, ripped out some LG braces, and  tore 2' of chinakote off the very bottom of the fuselage.  A couple longerons were broken in spots.  I call it a major minor repair...not a major disaster, but lots of work still must be done.  Of course the wheel pants are cracked here and there, as well as the cowl.

Ok, so I hung around taking my time because I needed help to get the truck started...either a kick start or a jump start.  NOBODY came for an hour.   At 1PM I had to take matters into my own hands.  I tried to push the truck to the old house so that I could kick start it on the little hill.  Couldn't move it but 30' and then it was slightly uphill to the house and I could not get it there.  I then pushed it back, and even tried to kick start in reverse, but could not get enough speed.  So I put the fuselage in the shed and everything else in the cab, locked her up, and headed for help.  I went across the street, slightly north, and there were young hispanics at the repair shop outside, so I asked for use of a phone, or a jump start.  First one guy let me a cell, then another said they could jump start me, so he took me and his cables in his pickup to the field and we got the truck started immediately.  I gave the guy $10 which he gladly took, and drove off.  I got my fuselage out of the shed and headed home uneventfully but fully aware of heeding the need to not kill the engine at anytime!

So insult to injury is what I got!  Double whammy of dead battery and busted plane.  ALL IN ALL, A GREAT OUTING, HAHA.  I took it in stride...came home and ate then removed the dead battery for going to Walmart tomorrow, mowed the lawn, spread moss killer on the lawn, sprayed moss killer on the roof, and here I am contemplating what repair on my Extra to do first.  RAAAATTS!

Oh the tips:  follow your instincts...I had a feeling the battery was too far gone, and I should have stayed home!  What a lousy start to my Year of the Golden Rabbit!

Wednesday, February 9, 2011

Happy Accidents

I finally oil painted again today after about a 6 month layoff!  I have been wanting to paint, but just never got the enthusiasm high enough to bust out the supplies and take the current RC plane project off the billiard table where all the paint equipment goes when painting.  Finally I got off my keester today and painted.  Bob Ross has been keeping me enthused with his shows on CREATE.  So here is painting #1 for 2011, and #21 since I took up the Bob Ross method in Jan 2010.  Happy Accidents refers to what Bob says..."we don't make mistakes, we just have happy accidents!"  I wish that man was still alive.

Sunday, February 6, 2011

Beefing Up

Just a pic of triangular stock installed to beef up the connection of the engine box to the fuselage firewall.  Another guy on RCU posted how he crashed his Ultimate doing a flat inverted spin, and that the engine box broke cleanly from the fuselage.  Upon reading that I checked my Ultimate and decided to add the triangular stock just to strengthen the joints there so they resist vibration fatigue better.  There is just a single layer of wimpy 1/8" lite ply that forms the top/bottom/sides of the engine box and that run continuously into the fuselage behind the firewall.  The triangular stock is 1/2" on the sides and 3/4" on the bottom of the engine box.  There is no space on the top of the engine box to add traingular stock there.  I used FG resin to glue the braces in and to coat them just like the rest of the engine box and firewall.  Final note: it's just weird that Aeroworks did not do this strengthening already since it is extremely common on most big planes!

Saturday, February 5, 2011

Flight Log: 02/05/2011

Kind of an ugly looking day with grey overcast all day, but it was 50F (felt colder), calmish, not raining, not foggy.  Got to the field and left around 2PM after putting in about 8 flights; I lost count again.  Maybe I need to do a tally sheet.  The Toledo Special was its usual special self.  I had many more than 8 landings as I practiced to land this one without bouncing.  It's getting better all the time.  None were really bouncy.  The trick it seems is to have a wee bit more speed and just let the plane settle in, and ease in just a tad of up elevator at the very end, but without stalling and bringing the nose up at all.  8 flights of 5 minutes = 40 minutes air time today, all FUN!  Did some turn and burn with Joe flying his BF-108.  They are evenly matched in speed, so it was fun doing low passes from the left.

Friday, February 4, 2011

Rejuvenation of Resin

I had a bottle of the resin half of the 2 part epoxy (30 minute) go bad once before.  It looked like honey crystalizing.  Tower gave me a new 2 part epoxy resin to replace it about 7 months ago.  Recently I noticed the same thing was happening to the resin half yet again.   It has not happened to my 6 minute epoxy nor the slow curing finishing resin.  WEIRD that it's happening again.  It made me second guess how I handle or store my epoxies but why would it happen to just the 30 minute but not the 6 minute or finishing epoxy resins?  I don't have the answer, but I remember seeing on RCU that guys have heated up the resin in the microwave to renew it.  With nothing to lose, I tried it myself.  IT WORKS!  Amazingly, just 10 seconds in the microwave turned the resin very thin, and in fact when I used it, it set up way faster than normal.  Hours later now, it is not overly thin anymore and it set up normally.  There are no crystals yet.  Looks like I won't have to complain to Tower about their epoxy again, lol.

FG repairs made easier!

Thanks to Joe, repair of my fiberglass wheelpants has been made much easier and neater!  Briefly, the steps below let you create fiberglass or nylon repair "tape" using 3M Super 77 multi-purpose spray adhesive, wax paper, and the fiberglass cloth or nylon tape of your choice.  After the FG or nylon is cured on the wax paper, you can cut swatches for your repairs of pants or cowls easily with just a scissors and not get those nasty loose fibers that keep unraveling at the edges.  When you remove the swatch from the wax paper, there is a slight tackiness that allows the swatch to be pressed onto the pants, fully conforming to the contours of the pants.  It's easy to just brush epoxy resin onto the swatch to complete the repair.  The method works so well that you can even use one piece to cover the outside of a crack, and the inside, by just bending the swatch around the edge of the pants...it sticks that good!  Here are the steps(stealing some of Joe's own words):

1.  Select and spray a piece of FG cloth with the spray adhesive.  The 3M Super 77 adhesive is real thin compared to most and it will dissolve in the resin that is applied later. It might not work with something thicker/stronger like some of the yellow ones or the “trim adhesive” styles that are a lot thicker and stronger.

2.  After the spray is tacky, lay and flatten wax paper to adhere to all of the sprayed cloth. 

3.  Then pull the cloth and paper up from the base while it’s still tacky or it might never come off or take part of the table with it.

4.  Smooth it out and flatten any ripples or bubbles.  Let dry.

5.  Cut a patch of the prepared tape when ready for repair.

6.  Remove wax paper backing.

7.  Stick the repair swatch to the part being repaired (after using CA and sanding if necessary).

8.  Spread resin or CA of choice on the swatch.  Joe uses alcohol to thin if needed.

9.  Done!

Here is a pic of the Super 77 and a couple pieces of repair tape ready to use (nylon on left, FG on right):

Thursday, February 3, 2011

Project Ultimate

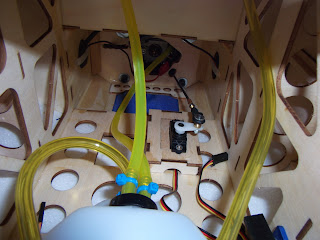
I am making steady but slow progress on the Ultimate!  Here's the throttle linkage:

This is the throttle servo set up:

Next here's the fuel tank installed:

The ignition battery is in, plus you can see the throttle and choke set ups:

And one more pic, the ignition installed:


FEELING GOOD about this plane!

Wednesday, February 2, 2011

Corvette Cruisin'

I had to take advantage of the sunny skies and 50F to drive the Corvette.  My cruise took me through Salem to head east on 22, then south to Aumsville and Stayton, then back west via Turner into Salem.  40 miles RT of listening only to the gurgle of the V8 and its 350hp blowing out the Corsas.  One hour of grins!